It is possible to organize your Gradebook into categories. For example, you may have categories for Quizzes, Assignments and/or Discussions Forums, with the quizzes might be worth 30% of the course total regardless of how many quizzes are given.
If you choose to use categories, it is important to choose the aggregation method to calculate the total for each category, so that your grades are calculated in the way you intend. Refer to Assigning weights to Grade Items for more information.
Adding a category
To add categories in the Gradebook or to configure their weighting factors, follow the steps below.
- Click Grades in the top row to launch the Gradebook. The Grader report is displayed by default.

2. Click on the Grader report drop-down menu and select Gradebook setup from the list.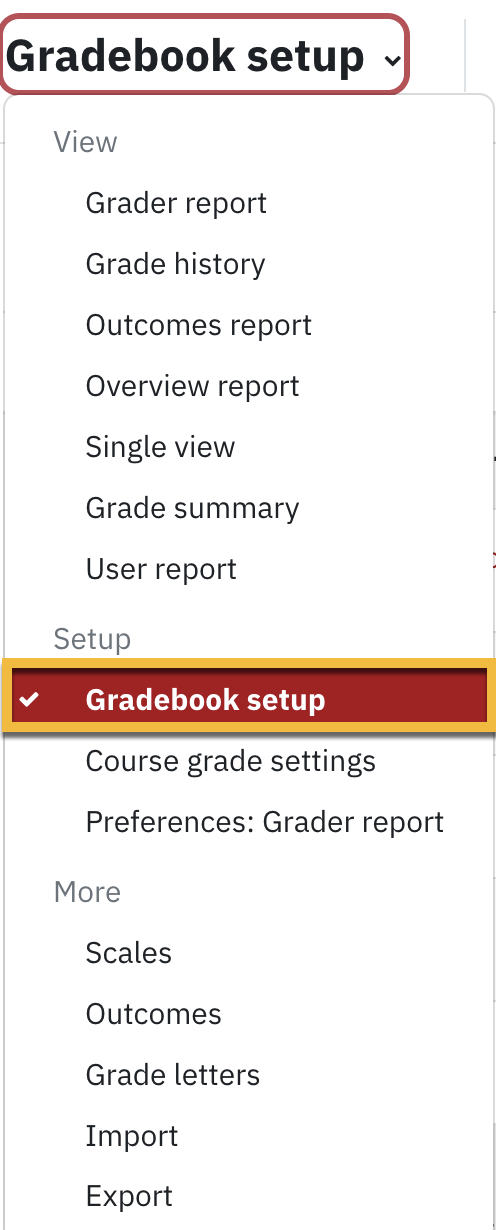
3. On the Gradebook setup page, click the Add category button.

4. Enter a category name, and optionally select Weighted mean of grades for aggregation method, click Save changes.

5. To move items into the new category, check off the activity you wish to move:

6. At the bottom of the page, there will be a Move icon - click on it
7. Select the category you'd like to move the item to:

8. Press Move
9. Repeat as required
Upon completion your gradebook will reflect individual assessment activities and others grouped within a category. See an example below:

You can customize a number of other settings here, such as selecting an aggregation method to use for grade calculation for items within the category, hiding or locking the grades; however, other than those specified here, the default settings are the recommended settings.You may need to click ... to display all the options.
Editing Grade Category
- In the Gradebook Setup, find the category you'd like to edit and click on the ellipses:

- Select Edit Category

- Choose an aggregation method for the category from the Aggregation drop-down. Aggregation refers to how grades in a category will be calculated. Note that the aggregation method to calculate the category total can be different than the aggregation method used to calculate the course total. Refer to Assigning weights to Grade Items for more information on using the different aggregation methods in categories.
- Simple weighted mean of grades where eClass will assign the weight of each item equal to its maximum point value.
- Weighted mean of grades: allows for each item to be assigned a specific weighting factor. The mark of an item is multiplied by the weighting factor assigned to it.
- Natural: The category total will be the sum of all grade values scaled by weight. It can be configured to generate either mean or sum of grades with or without considering weight.
- Uncheck Exclude empty grades checkbox if you would like to aggregate all grades towards course total. This means that the grade items that do not have a grade for the student will be counted as a zero.
- Enable Include outcomes in aggregation if you want to include the results of designated outcomes in the calculation of the grades. A note that this may result in unexpected results.
- Select the number of lowest grades to be dropped from the Drop the lowest drop-down If you would like to exclude any of the grades from the aggregation.
- Click Save changes button.
The item now appears in the Gradebook.
Category Total

- Type a title in Category total name (1) if you would like to display an alternative title instead of Category total in the last row. For example, you may choose to name the total Assignments Total.
- Enter any relevant information for the category in the Item info (2) box. This information is only available to the teacher and only in this location.
- Type an ID number (3) in the box if required. ID number is generally only used when creating a custom formula.
- Maximum grade and Minimum grade field can only be populated if you are using Value Grade type (4). Enter maximum grade a student can receive in the category in the Maximum grade field. For example, if you are marking the item out of 10, 10 is the Maximum grade.
- Enter minimum grade a student can receive in the category in the Minimum grade (5) field.
- Enter appropriate passing grade in Grade to pass (6) field if you would like to use activity completion in the course. Conditions can be set on other activities to make them unavailable until a minimum category grade is achieved.
- You can also select to display your grade as letter, number (real), percentage or any combination of the two from the Grade display type (7) option.
- Click Hidden (8) check box to hide category total from students view. This can be set on until the instructor removes the hidden check mark or it can be hidden until a particular date and time.
- Click the Locked (9)checkbox if you would like to restrict grade updates. This may be useful when TAs are grading the activities and you want to ensure grades you have recorded are not modified. The instructor can always remove the lock and modify grades if required.
- Click Save changes (10) button.
The item now appears in the Gradebook.
Parent Category
- Select an alternate Parent category from the drop-down if you are creating a sub-category.
- Click on Save changes button.
The item will now appear in the Gradebook.