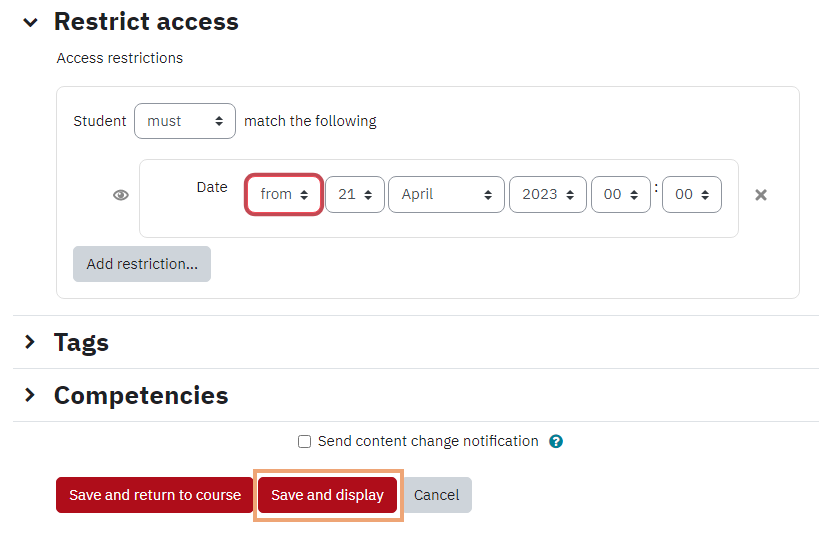
The Restrict Access feature enables teachers to restrict the availability of any activity or even a course section according to certain conditions such as dates, grade obtained, group or activity completion. This is useful for make up tests, special projects, etc.
In this article, we will discuss the benefits of Access Restrictions, what activities and resources we can add Access Restriction to, the criteria based on which we can setup Access Restriction, and finally the step-by-step instructions on how to set it up.
Benefits of Access Restriction
- It allows the instructor to tailor the course to specific students' needs, making it more flexible and responsive.
- It allows the instructor to manage visibility of certain content of the course based on groups, which is useful in situations where the participants of a course are divided into groups (such as different tutorials).
What Activities/Resources can you utilize Access Restriction with?
All Activities and Resources implemented within eClass have a Restrict Access section in their settings, which allows the instructor to add Access Restrictions
What criteria can you setup Access Restriction based on?
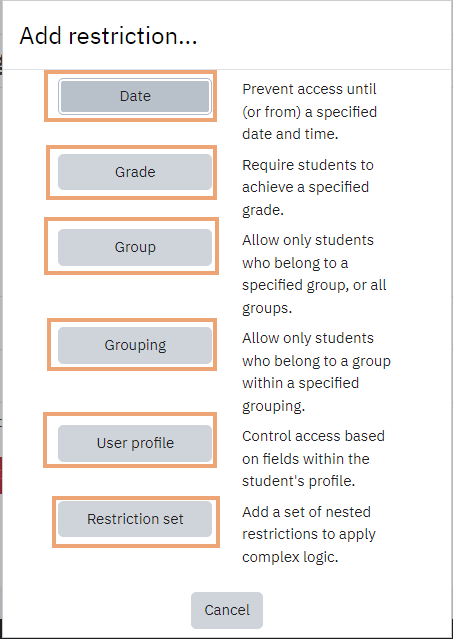
Date - Prevent access until (or from) a specified date and time.
Grade - Require students to achieve a specified grade.
Group - Allow only students who belong to a specified group, or all groups.
User profile - Control access based on fields within the student's profile.
Restriction set - Add a set of nested restrictions to apply complex logic.
How to setup Access Restriction on an activity/resource (such as an assignment)
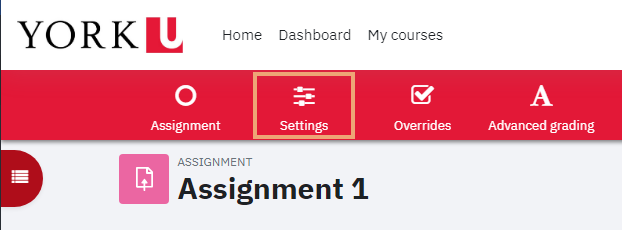
- Click the activity or resource on the course page, then click the Settings on the top menu bar of the activity/resource.
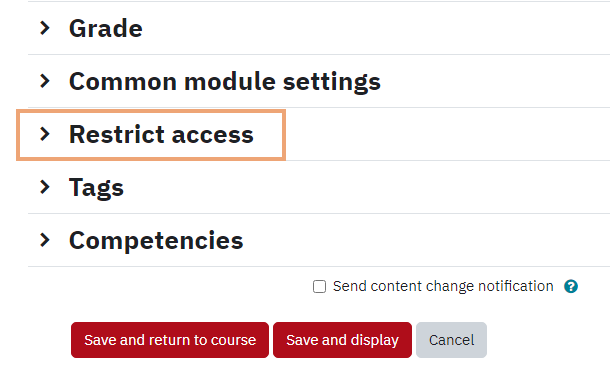
- Scroll down through the settings and click the Restrict Access section in order to expand it, as shown below:
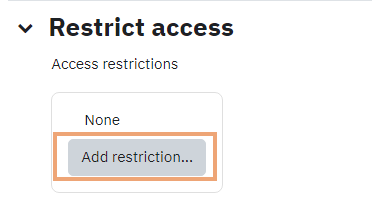
- Click Add restriction... as shown below:
- Select the restriction(s) you are interested in - there can be more than one.
- In this example, I have selected User Profile, a very common user restriction setting.
1) The options here are Must or Must not.. Must includes the parameters listed afterwards (they must be part of the restriction), while must not excludes them.
-
We can make a conditional OR statement, or an AND statement. By changing Any to All in the highlighted box above, we affect the conditions "or" and "and" indicated by the arrow. In this example, a student must match all of the following conditions - be in the time range entered AND have their first name contain "Mik". You can add more restrictions, and even nest them
To hide/show the restrictions on the course main page, see substep 4) on the 5th point above.
- Lastly click Save and Display at the bottom of the page.
