What's in the box?
 Components inside the box
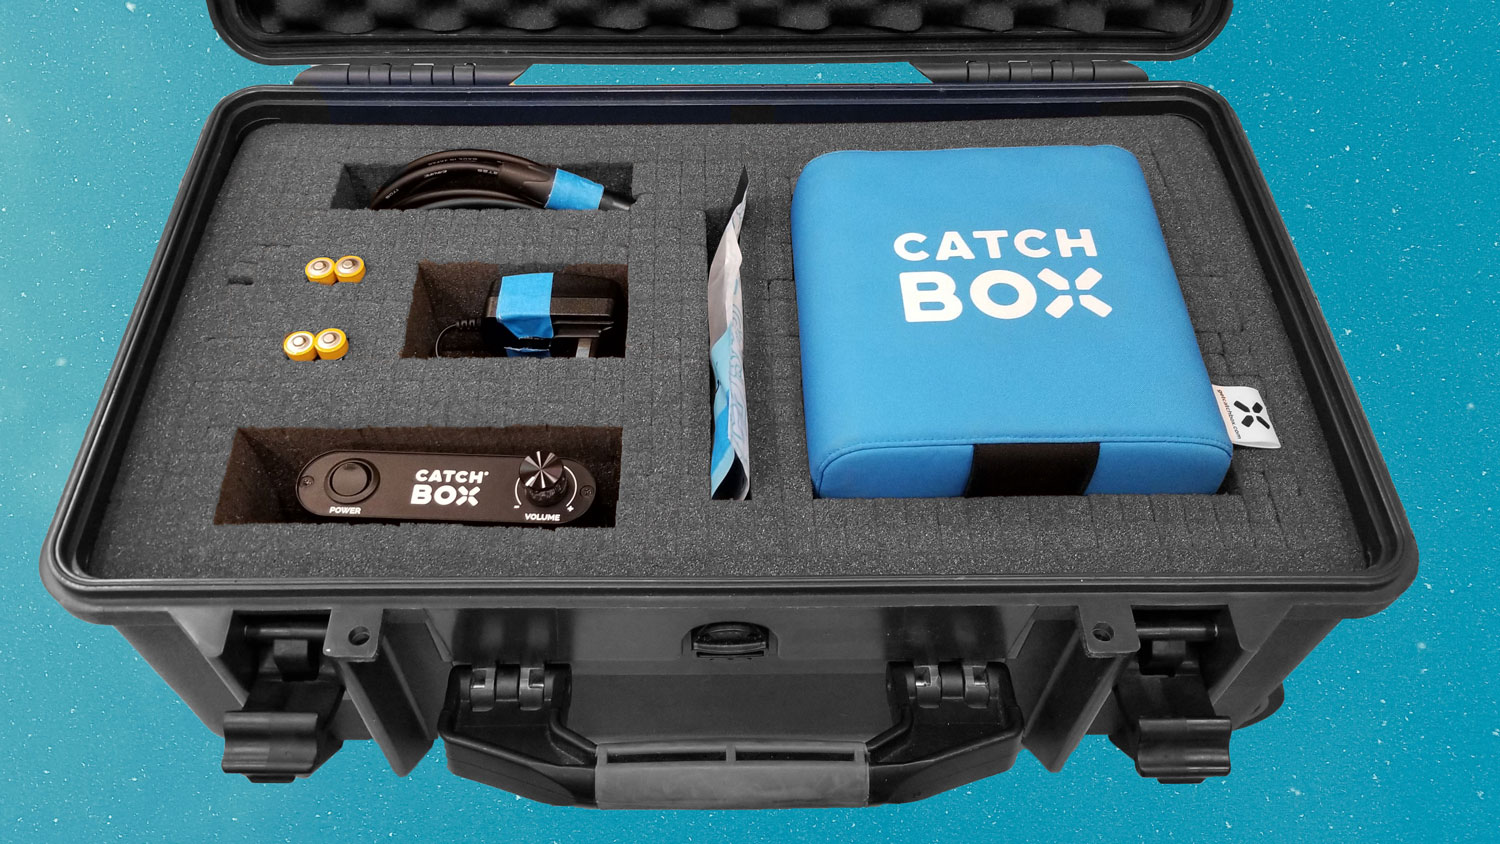
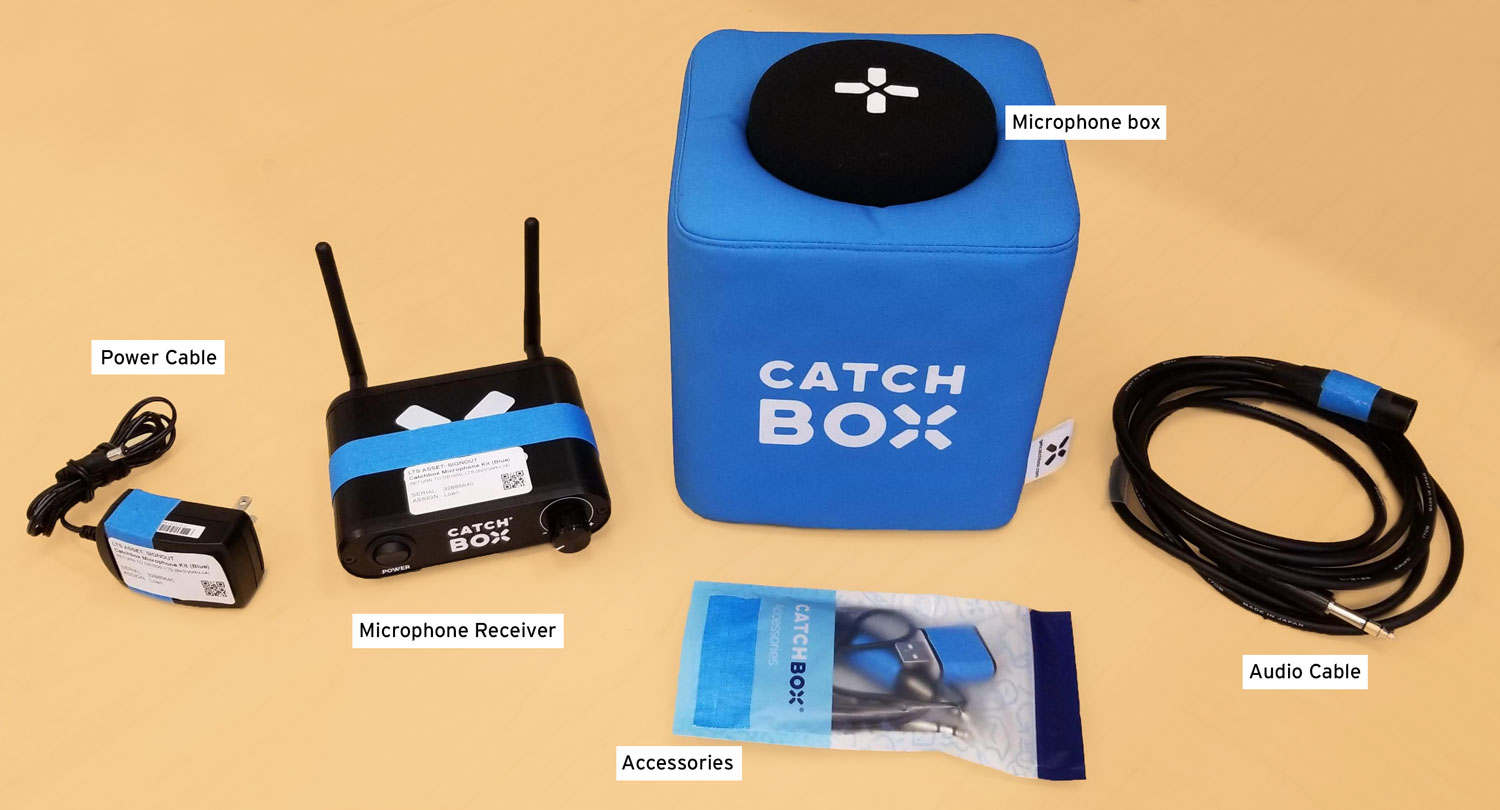
The Catchbox kit consists of the following items:
- Microphone (fabric) box
- Microphone (transmitter, in the fabric box)
- Microphone receiver
- Power cable (AC adapter)
- Audio cable (XLR to TRS, 9' cable)
- Six (6) AA rechargeable Batteries. There are three (3) pairs. One will be in the microphone, and two (2) pairs will be in the case
- Accessory bag
How to set it up
To use this device, the room needs to have XLR input built-in. Please click here to see if your room qualifies.
1. Arrange the antennas of the microphone receiver so that they are parallel to each other. The easiest way to do this is to stick them straight up, perpendicular to the chassis of the receiver. To ensure the strongest connection between the receiver and the Catchbox as it is thrown about the room, ensure that the antennas have a clear line-of-sight to the Catchbox.
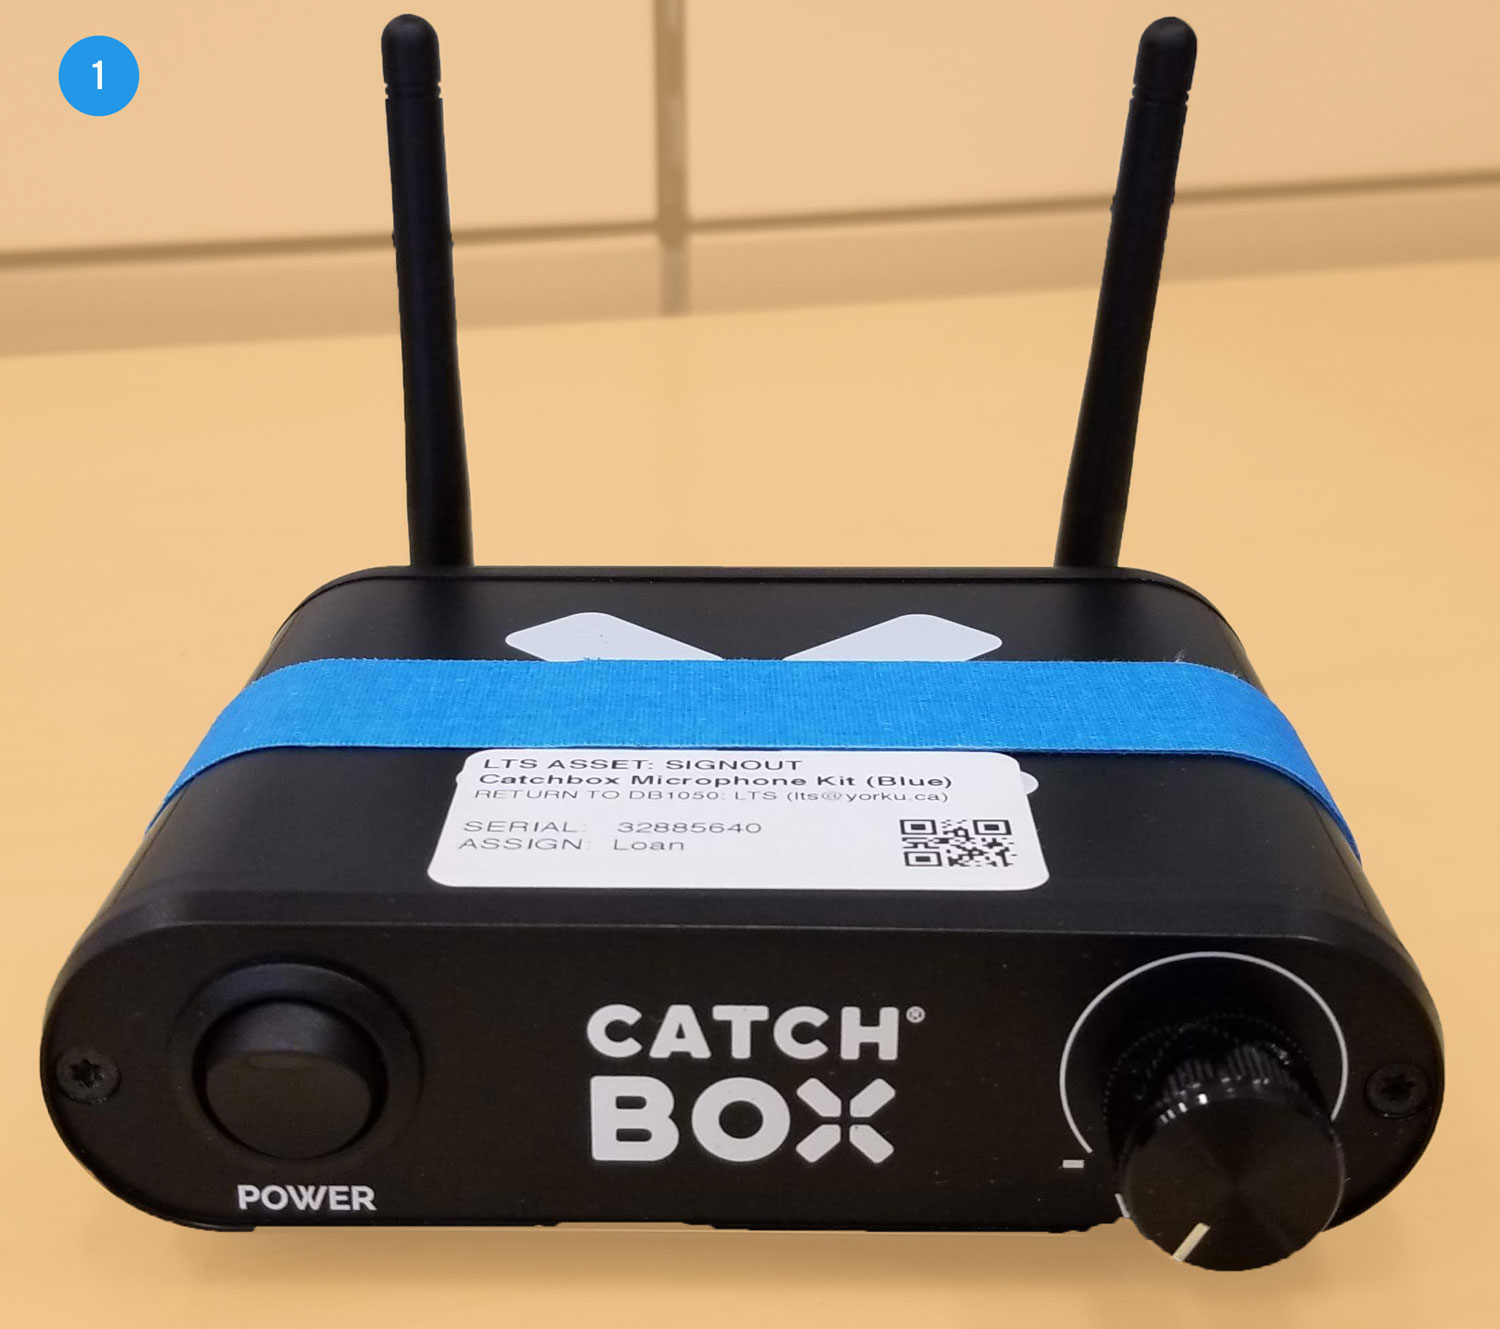
2. Connect the power cable and audio cable to the back of the microphone receiver. Ensure that the receiver's volume knob (right) is turned to the 'off' position, and that the power-toggle switch on the device (left) is off. This will ensure that no pops, feedback or loud squelching will occur when you turn everything on.
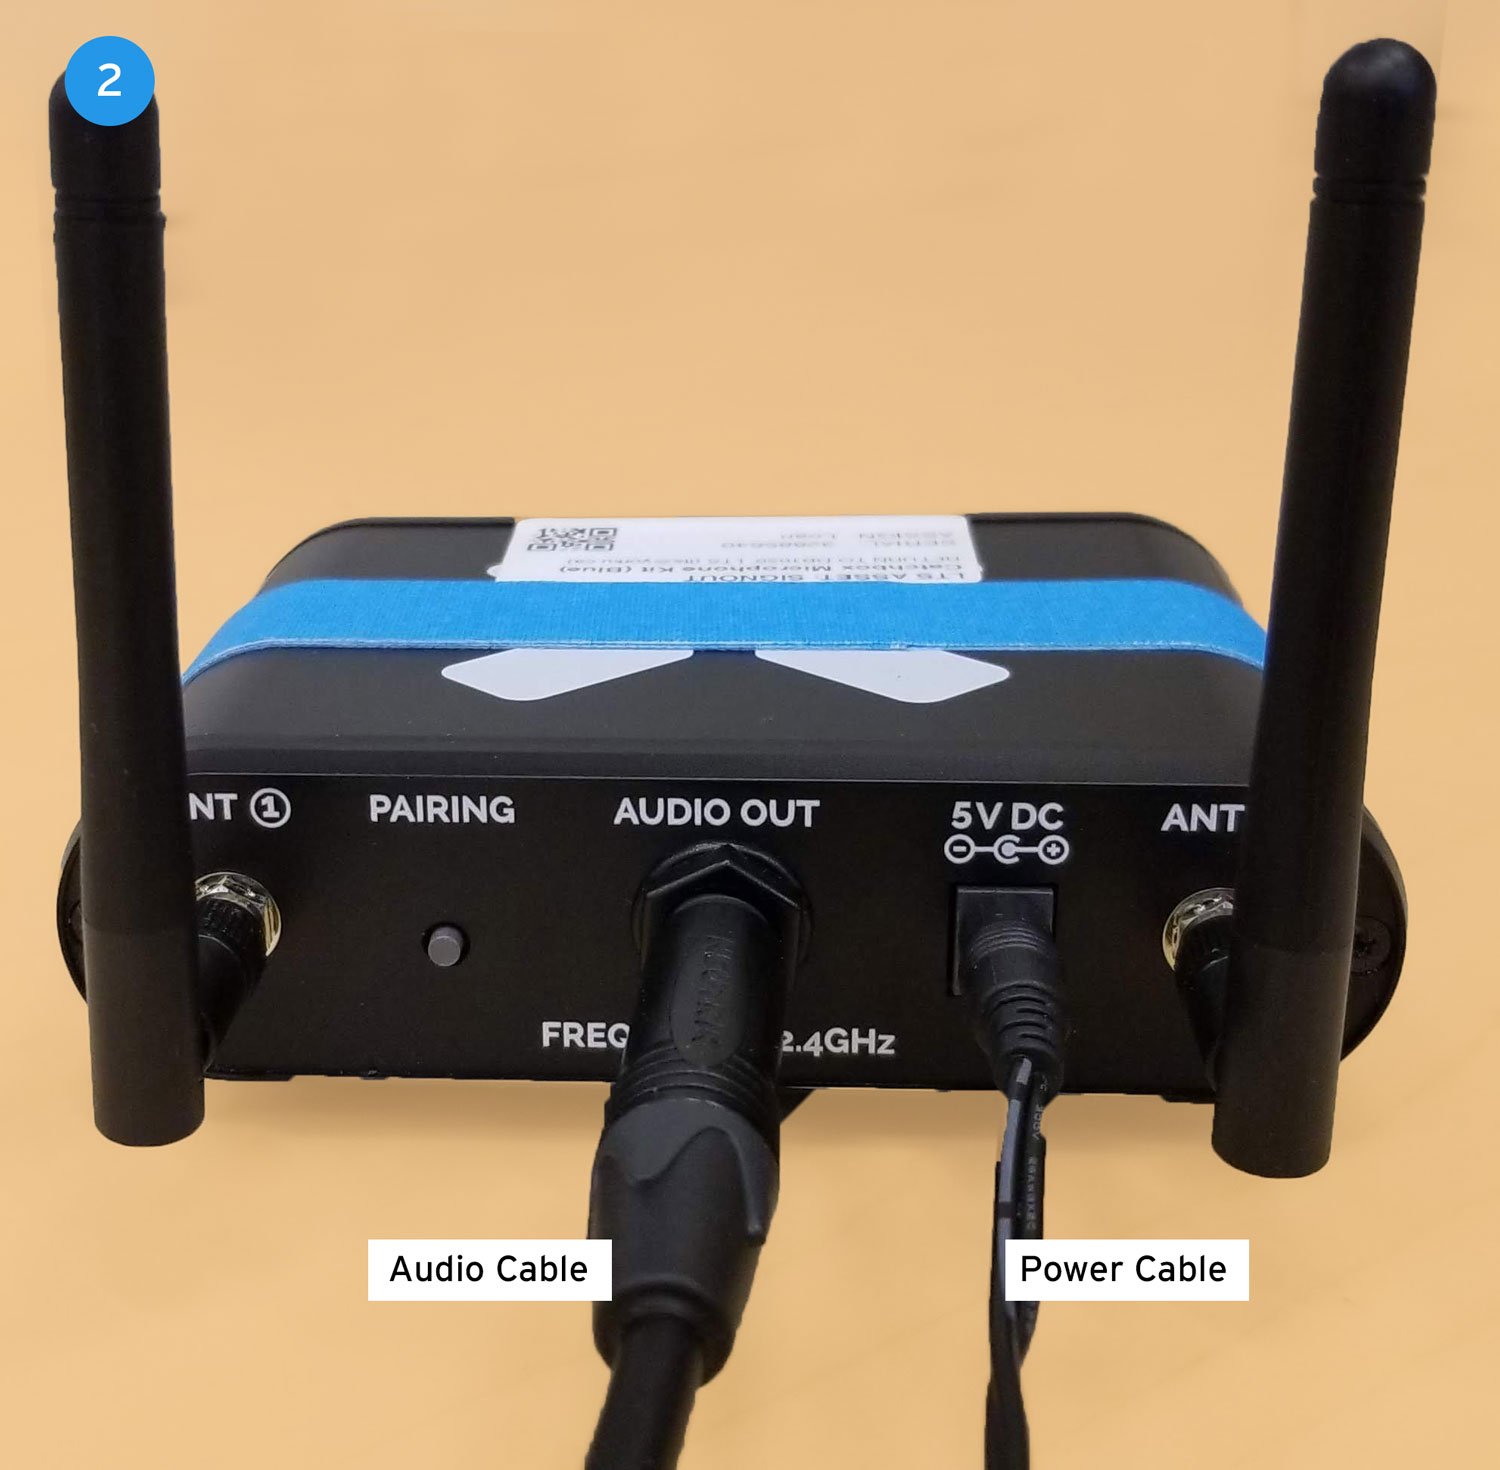
3. Plug the power cable into the closest power outlet. Avoid tripping hazards by using a plug at the podium and not on a nearby wall.
Next, plug the XLR cable in to the XLR bulkhead at the podium. Ensure that you do not create any hazards with the wiring here also. When possible, try to keep all of the plugs and cabling on the same table (or podium) and ensure that no wires traverse any walking spaces. Please keep the safety and security of both you and your students in mind when integrating this tool into your classroom practices.
4. Twist and pull the microphone to remove it from the outer cover. The microphone is magnetic. Twisting the microphone will ensure that the magnetic contact is broken enough for you to pull the microphone out from the sleeve. Some effort is needed so please don't be overly concerned that you will break it.
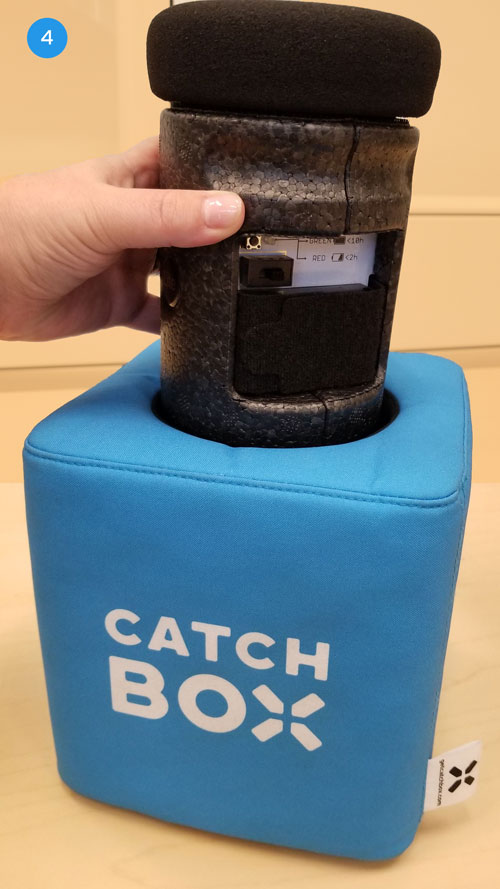
5. Check to see if the transmitter has batteries by peeling the dark-grey velcro cover back. If there are batteries, then turn it on by flicking the toggle switch from the 0 position to the I position.
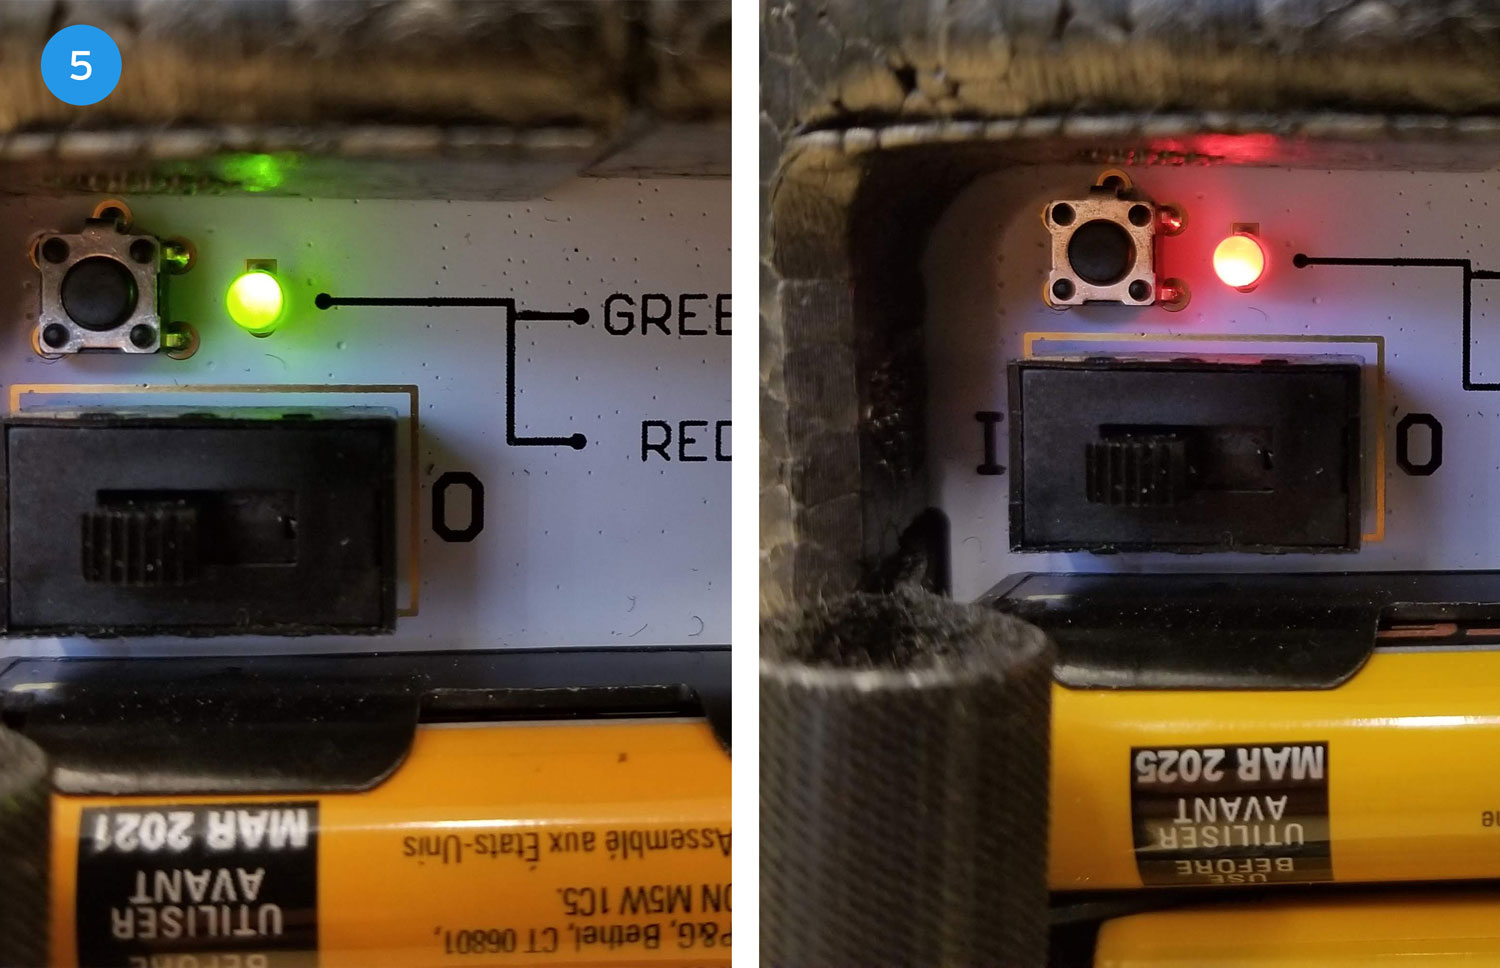
The green LED light flash means the transmitter will work for less than 10 hours. If the red LED flashes, then the transmitter will likely only work for less than two hours.
We recommend that you switch your batteries upon seeing the red flashing light.
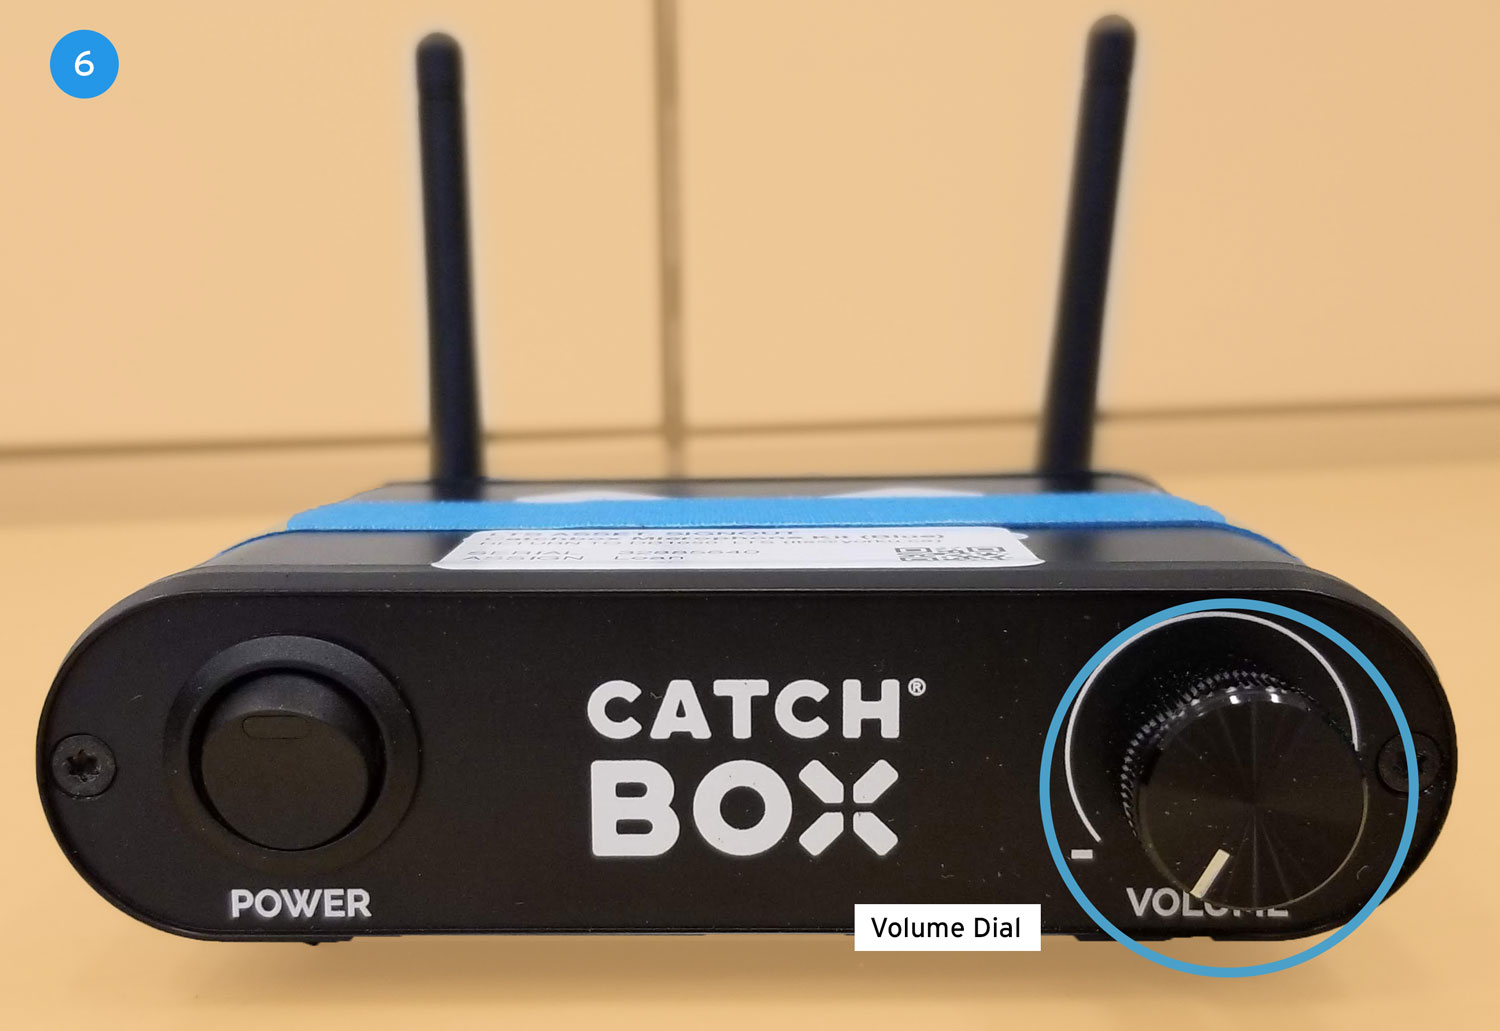
6. With the microphone on, you can now click the power toggle switch to the on state. A green light will appear on the toggle when properly powered. You may now slowly turn the volume dial clockwise until you hear the microphone in the classroom's PA system. If there is ringing in the PA system, turn the dial counter-clockwise until you no longer hear a ring.
7. Place the microphone back to the outer cover. You should hear it snap into place as the magnet locks itself into place. If it's still loose, twist the microphone until the magnet connects to the base.

8. Say a few words into the microphone to test for the proper amount of sound from the PA system. If it is too low, then fine-tune the sensitivity by turning the volume dial slowly clockwise, or counter-clockwise until you're satisfied with the level.
If during your session, you develop any feedback in the room, have whomever is holding the microphone to tilt it away from the speakers in the room. Most times this will be from the ceiling. In this scenario the individual would point the microphone to their chest or to the floor. When the feedback abates, the speaker can try to speak again by tilting the microphone on a steeper angle, away from the speaker.